 |
| Basic guide on how to create a google Adsense account (beginners guide) |
As a blogger you must have heard a lot about Google Adsense advertising program which is the best contextual advertising program for your blog and driven by Google.
There are many Google Adsense competitors available in the market but no matter what ad network you try to earn money, you are more likely find that Google Adsense is the best because of high CPC.
Beginners who has just started blogging may not find it comfortable with Google Adsense as it is a foreign concept for them. Same thing happened to me. When I starting blogging, I didn't know even A-B-C of Google Adsense. It was a foreign concept for me too. I had to ask my friends who were quite familiar with the Google Adsense concept and using it for a while. Also I did some research on Google Adsense to get in depth knowledge. But when I initially signed up for Google Adsense I wasn't sure if I am doing it right.
For newbies who are not familiar with Google Adsense, Adsense is an online advertising program driven by Google which let us to show ads on our blog. Pretty simple. You need to know how you can get a Google Adsense account approved to show ads on your blog. Adsense program is based on PPC (pay per click) method which means when there is a valid click on Adsense ad, you will be paid some amount decided by advertiser. If I talk about payment, Google Adsense has minimum threshold of $100. Once your earning reaches to $100 you will get paid next month.
Check out why Google Adsense is the best advertising program for your blog.
Still not sure how to apply for Google Adsense? In this post I will show you a step by step guide to create Adsense account. This is a newbie friendly Adsense guide to get you started.
Prerequisite:
- You must have a blog or website
- You must be 18+
- If you are below 18, you can create an Adsense account using the name of a parent or guardian who gives you permission to do so.
Before you create a Google Adsense account to monetize your blog, please read the Adsense policies carefully to ensure that you blog is abiding by the Adsense policies.
An Exclusive Step By Step Guide To Create An Adsense Account (for newbie bloggers)
1. Head over to Google Adsense sign up page
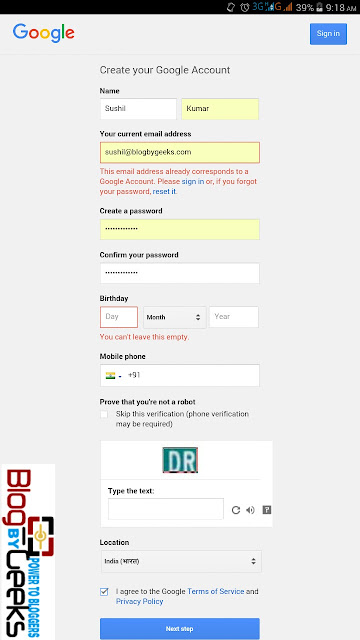
You will be asked to create a Google account or you can use your existing Google account. if you are using domain specific email address, I would suggest you to use this email address to sign up. Why? Because when you use domain specific email address, it looks professional & shows your seriousness and you are more likely to approve by Google Adsense. |
| sign up for Google Adsense |
Fill in all the details, click on next step.
2. Tell us about your content
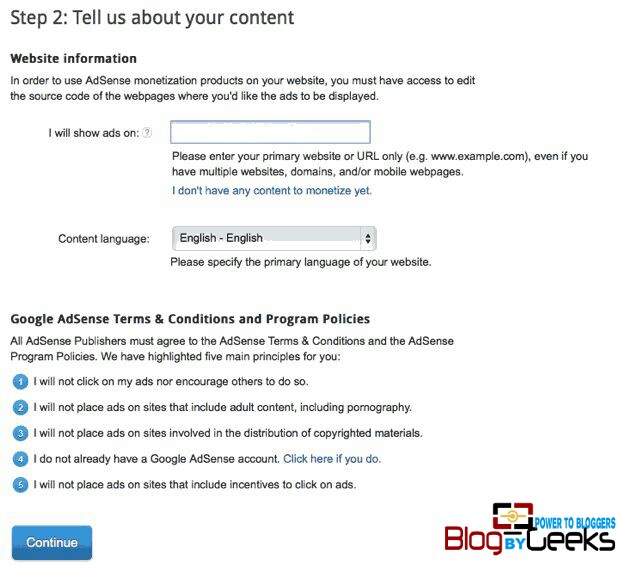
Here you need to key in your website details. Enter you website address and select content language and hit continue. |
| Tell Google Adsense about your content |
Note: Do not enter your blog address with http://
Simple key in www.yourdomain.com
3.submit your Adsense application
 |
| Submit your Adsense application |
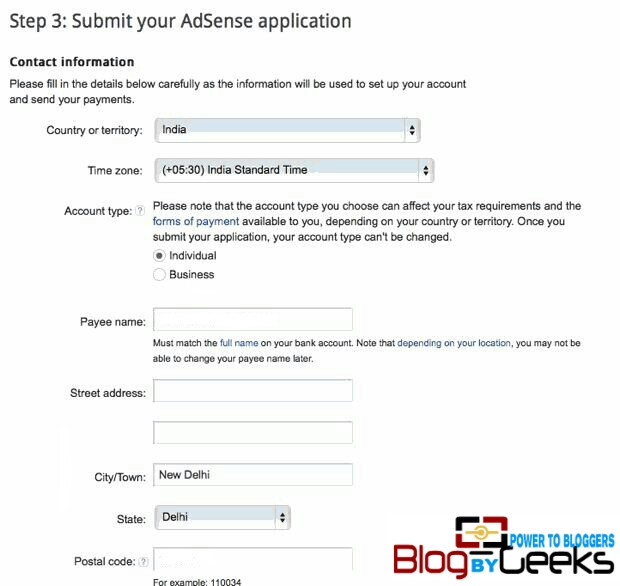
In this step, you need to enter your contact informations. This step is very important hence do it carefully. I made few mistakes while filling it so i don't want you to make any mistake. Under Payee name enter your name which is there in your bank account. If you make any mistake here, it can be difficult to change the payee name after sign up or even not possible at all depending upon your geographical location including India. Google does not allow these countries to change the payee name after signing up. So make sure to use the same name as you have in your bank account because Google Adsense will be sending you checks in favour of payee name. Ensure to have your bank account name and payee name identical.
Once you have filled all the details, please verify if they are correct and up to date then click on submit my application to finish with the Adsense registration.
Now Google Adsense review team will review your blog and details which you have provided in the application. If everything goes well, you will get an approval email from the Adsense review team. But If your account is disapproved, they will provide you the reasons basis your blog is not able to get into Adsense. Work on those things to improve your blog and they re-apply for Adsense.
Also read : Ultimate DIY Guide on How to use Adsense to make money online
Are you facing any challenge in setting up a Google Adsense account? Do let me know. I will help you to get there. +1 us on google+ and folliw us on other social media.
Good luck!


0 comments:
Post a Comment